Wondering what Mobile phone has to do with microscope? Yes it can have some provided it has a decent camera. How? Let us see.
Optical microscopes use combination of two lenses to produce magnified image which you see. Basically it consists of one lens which is placed close to the object to be magnified. This is called Objective Lens. This objective lens is mounted on one end of a tube. The other end of the tube carries another lens called Eyepiece. See the figure 1.
The Objective lens has a very short focal length of the order of few millimeter. When the object under observation is place close to Objective lens, but beyond its focal length and properly illuminated, a real and inverted image is formed on the other side of the Objective lens. See the figure 2. You know that when the object is place beyond f (focal length) but less than 2f of a convex lens, the image is real, inverted and magnified. The magnification is equal to the ratio of the Image distance and object distance assuming a thin lens.
The Eyepiece is also a convex lens, having relative short focal. When the real inverted image is place close the Eyepiece with distance less than focal length, a magnified virtual image is form. If this distance is properly adjusted, we can have the image formed at the comfortable viewing distance of about 25 cm. The may have magnification of 10x or 15x.
Regular microscopes have three Objectives of different focal lengths on a rotatable mounting to select the required one. The magnification provided by these Objectives are 10x, 40x and 100x. The 100x Objective has very small focal length and used with a film of oil between the lens and the object under observation.
Now, let us to the mobile phones. As the mobile phones are thin gadgets, the available distance between the lens and the image sensor is very small and of the order of millimetre. Latest high end mobile phones come with multiple cameras having lenses of different focal lengths. You may have a old mobile phone which is obsolete or beyond repair, a lying as junk. You do not know what use it may have. If it has a decent camera, you can make use of the camera lens as Objective lens of microscope.
How to start?
Find out any suitable junk mobile smart camera phone in you store. Very old mobile phones had cameras of very low quality. Those camera lenses will not be of good enough quality. Carefully dissemble the phone and take out the camera lens carefully. See the picture of the camera lens I salvage from an old Sony Xperia.


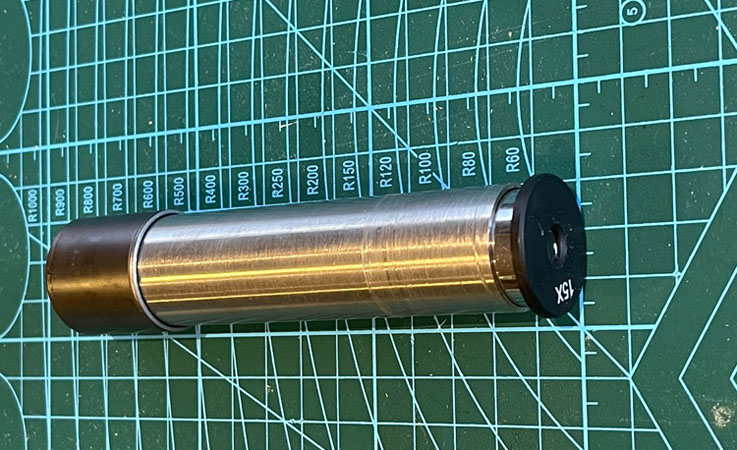
Get one tube of approximately 12 cm with ID of 23.5mm (to suit your eyepiece). This tube you can cut from Stainless Steel curtain rod of 1 inch OD. Another longer tube of about 170 mm also can be kept ready to examine the effect of distance between the objective lens and eyepiece on magnification.
IT IS NOT ESSENTIAL TO USE A SS TUBE, WHICH MAY BE DIFFICULT TO CUT AND FINISH. A PLASTIC TUBE, ELECTRICAL CONDUIT OR CARDBOARD TUBE, WHATEVER IS EASILY AVAILABLE AND HAS SOME STRENGTH WILL DO. IT SHOULD HAVE RIGHT INSIDE DIAMETER TO HOLD THE EYEPIECE PROPERLY. EVEN SLIGHTLY THICK PAPER ROLLED MULTIPLE TIMES ON A CYLINDRICAL OBJECT WITH THIN COAT OF FEVICOL BETWEEN THE LAYERS WILL BE NICE FOR THIS PURPOSE.

Get one bottle cap which can snugly slide onto one end of the tube. Fortunately I could get one metal cap from a scent spray bottle, snugly fitting on the tube.

The next item you to buy. A microscope eyepiece of 10x or 15x magnification. It is easily available in Amazon, costing around INR300. Check the diameter is approximately 23.5mm.

Now slide the bottle cap over one end of the tube. It should fit snugly. If it is lose fitting, wrap some cello tape layers to make it snug fit.
On the other end of the tube slide the eyepiece in. If it is too tight, grind the inside of the tube to the extent it is needed. If too loose, apply some cello tape on the eyepiece to make it fit.
Drill a small hole at the center of the cap. The hole should be just enough to fit lens little tightly so that it does not fall off. At the end, when finished you may put a bit of cyanoacrylate adhesive to fix it.

Now slide the cap with lens and eyepiece at respective end and your pocket microscope is ready to use.

To observe any object through the microscope you need to illuminate it from behind. In case if it some thing mounted on slide you can place it over the torch led of your mobile phone or even use phone white screen.
Depending on the quality of the image phone camera lens you can get very good quality distortion free magnified image. By increasing the length of the tube you will get proportional increase in magnification but will become more and more difficult to keep it steady by hand holding.
A fixture to hold every thing together with distance adjust mechanism will make it a very useful gadget. I plan to follow up this with a simple and functional upgrade in that respect.


This is such an interesting DIY project. I am kind of waiting now for my phone to become old enough and thus ‘eligible’ for this experiment :D. Although I am a little skeptical about a few requirements like finding the right kind of parts dimensions wise, and drilling/creating a hole etc. but would like to wing it nonetheless :).
Thanks sir, for writing this post.